Important: If you open your KRONOS, you do so at your own risk. It is possible that you could void your warranty. It is also possible you could mess something up. I am not responsible for any negative consequences of anyone opening up their unit.
I have not yet found a definite solution to the fan noise, but will show my procedure here so if anyone believes they have found a quiet-enough fan with enough airflow, they can test it. EDIT: I have now found a quiet enough fan, see subsequent posts. This post still shows an acceptable way to replace the fan.
Things to keep in mind:
- It is hard to find truly quiet 60mm fans.
A 70mm might fit in the case, but would require custom mounting holes (and they often aren't quieter).
An 80mm fan will not fit in the same orientation as the current fan.
A given dBA rating does not guarantee the same volume once you install the fan.
Many ratings by manufacturers are unreliable.
For these reasons, it may be hard to find a fan that is better on all fronts. The fan below (with my mounting method) has less low frequency vibration (less hum) but somewhat more whoosh (hiss). It reads 42 dBA measured as described above.
Procedure
This procedure is designed to be completely reversible, except for 1 cut zip tie.
Put in spacer cards for weighted keys.
Flip over keyboard on pillows or a soft surface that will protect all knobs.
Remove all screws, note the tension on them for when you replace them.
The pictures assume you have the unit upside down with the keys pointed toward you.
Supplies for this work:
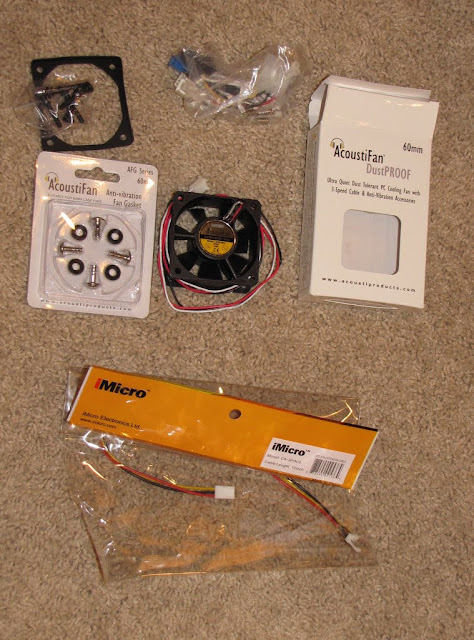
- The fan you want to use, and probably a 3-pin fan extension cord.
Optionally: Rubber mounts and gasket.
Perhaps small zip ties
<a href="
https://picasaweb.google.com/lh/photo/W ... site"><img src="
https://lh4.googleusercontent.com/-neeO ... G_1925.JPG" height="640" width="474"></a>
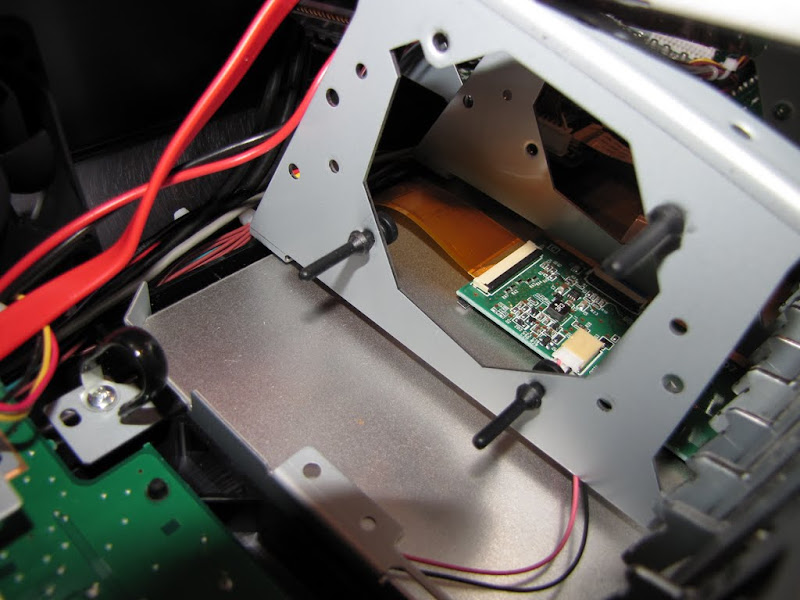
Stock setup. Note, only 3 bolts in place. Also notice the zip tie on the inductor magnet to hold it shut.
<a href="
https://picasaweb.google.com/lh/photo/R ... site"><img src="
https://lh5.googleusercontent.com/-Skyy ... G_1926.JPG" height="600" width="800"></a>
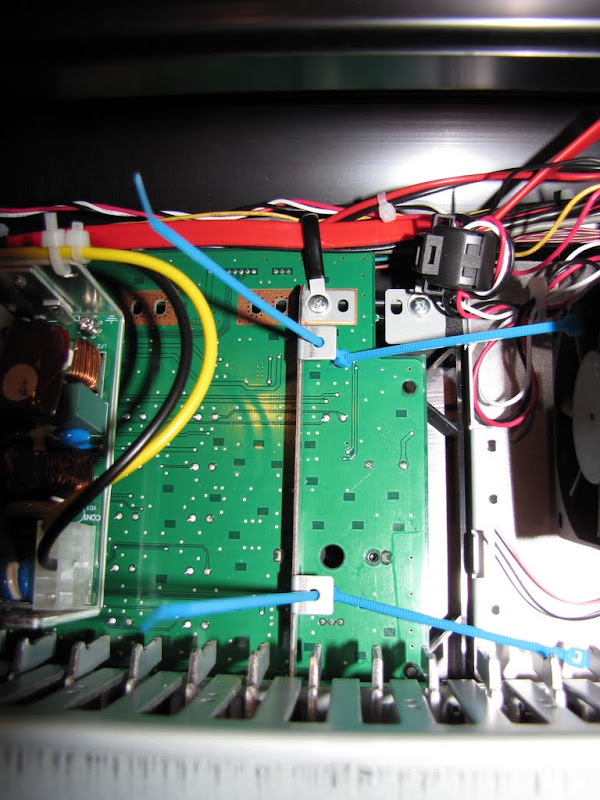
Back in the left hand corner is the motherboard. This is where the fan plugs in.
<a href="
https://picasaweb.google.com/lh/photo/K ... site"><img src="
https://lh5.googleusercontent.com/-Yl24 ... G_1927.JPG" height="638" width="800"></a>
Helpful tools:
Small wire cutters.
Stubby #2 Phillips screwdriver
Small needle nose pliers
<a href="
https://picasaweb.google.com/lh/photo/t ... site"><img src="
https://lh3.googleusercontent.com/-NDma ... G_1929.JPG" height="480" width="640"></a>
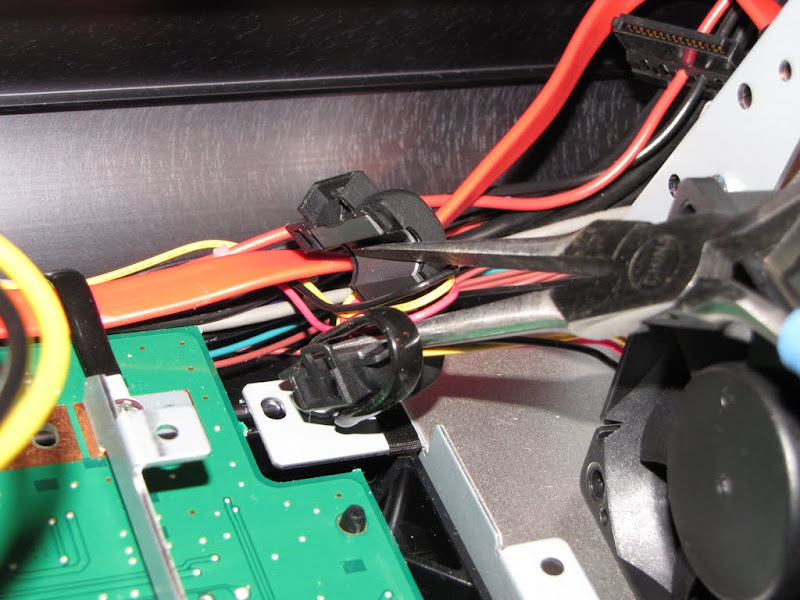
The fan can be removed carefully with the short Phillips screwdriver.
The zip tie on the inductive coil must be cut (with the wire cutters). You can then use the needle-nose pliers to pop it open. This is to allow you to run the new fan power cables through the inductor, which helps prevent interfering signals from being transmitted through the wires (from the fan, etc.). This coil can be removed from its flexible mount.
<a href="
https://picasaweb.google.com/lh/photo/q ... site"><img src="
https://lh4.googleusercontent.com/-hRiG ... G_1930.JPG" height="600" width="800"></a>
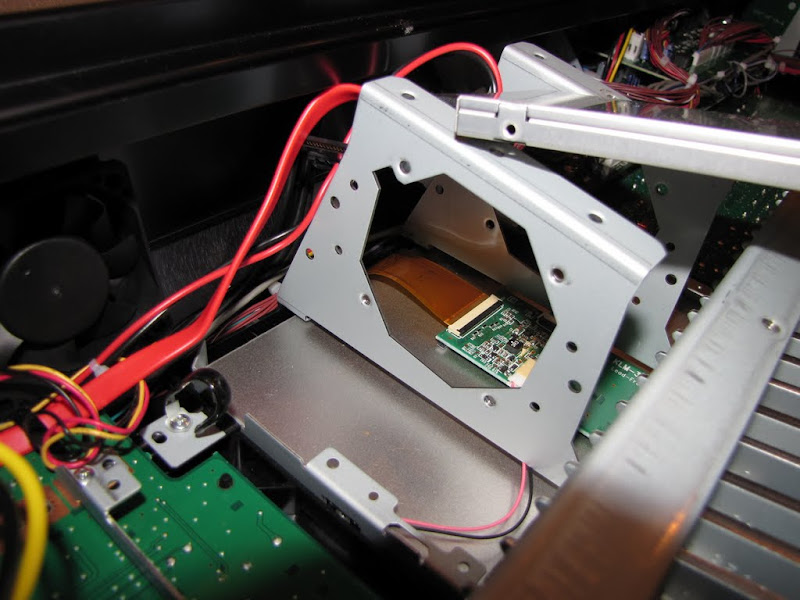
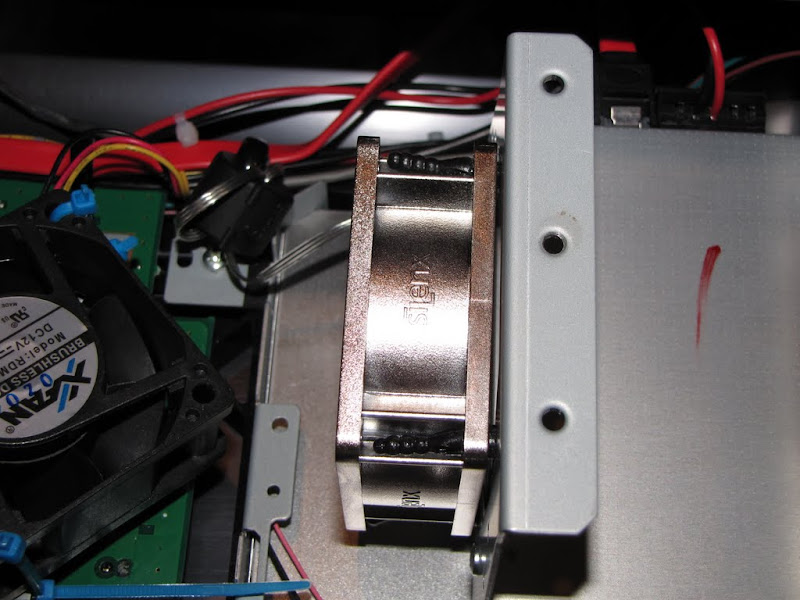
Here is the fan removed. You can see how it is up against the side of the SSD. (The blades going past this might be a source of turbulence or cavitation, creating noise). Notice also that there are holes for mounting a 2nd drive. The power for this drive is already present, though the SATA cable would have to be added and run to the motherboard, I believe.
<a href="
https://picasaweb.google.com/lh/photo/o ... site"><img src="
https://lh5.googleusercontent.com/-7PIN ... G_1931.JPG" height="600" width="800"></a>
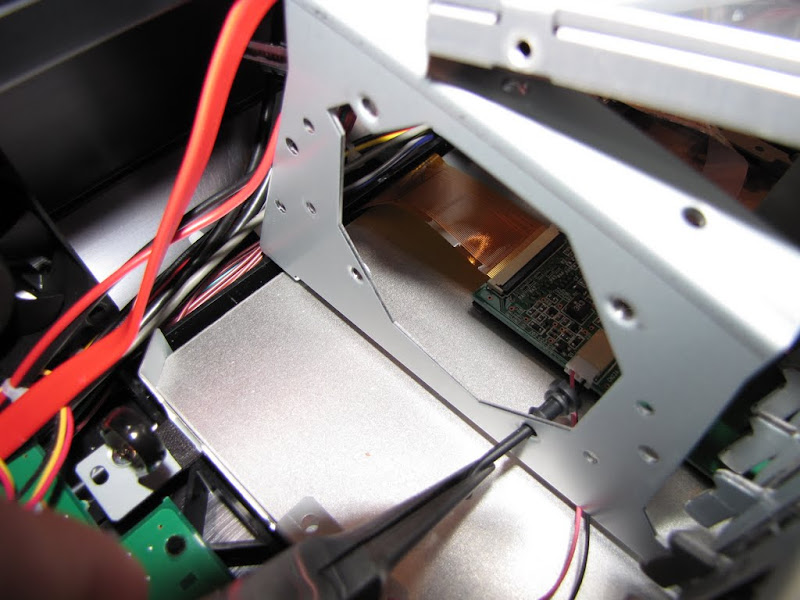
In order to insert the rubber mounts, the SSD must be remove (4 screws, be VERY careful to not drop them). By the way, the rubber mounts will not work with the original fan.
<a href="
https://picasaweb.google.com/lh/photo/o ... site"><img src="
https://lh6.googleusercontent.com/-vSWP ... G_1934.JPG" height="600" width="800"></a>
Insert the rubber mounts from the back. These holes are smaller than is typical for these mounts, so it is a tight fit. You can pull on one end with pliers or fingers while pushing on the other end.
<a href="
https://picasaweb.google.com/lh/photo/q ... site"><img src="
https://lh6.googleusercontent.com/-S-Uy ... G_1935.JPG" height="600" width="800"></a>
Picture of 3 mounts inserted:
<a href="
https://picasaweb.google.com/lh/photo/m ... site"><img src="
https://lh6.googleusercontent.com/-S5nN ... G_1936.JPG" height="600" width="800"></a>
Replace the SSD. You can choose to add a gasket to your fan and then install it.
<a href="
https://picasaweb.google.com/lh/photo/u ... site"><img src="
https://lh3.googleusercontent.com/-Vx7q ... G_1940.JPG" height="600" width="800"></a>
Or you can just use the original screw with a new fan and see if the new fan is an improvement.
Switch the fan power wires. You can leave the existing fan in place so as to not disturb anything.
Secure the fan power wire to the existing wires. Also secure the (now unused) original power wire. I zip tied it (zip ties came with the fan) back on itself.
<a href="
https://picasaweb.google.com/lh/photo/Q ... site"><img src="
https://lh3.googleusercontent.com/-yQ3F ... G_1942.JPG" height="600" width="800"></a>
Run the fan wires around the inductor as they originally were, and if you have excess cable, make sure it is managed so it will not bother anything.
<a href="
https://picasaweb.google.com/lh/photo/O ... site"><img src="
https://lh3.googleusercontent.com/-FdRx ... G_1946.JPG" height="600" width="800"></a>
So what about the original fan? I did not want to cut any wires or undo any of the bundles. So, I took some zip ties and ran them through some unused holes...
<a href="
https://picasaweb.google.com/lh/photo/w ... site"><img src="
https://lh4.googleusercontent.com/-dTkx ... G_1947.JPG" height="800" width="600"></a>
And then secured the original fan to those for now.
<a href="
https://picasaweb.google.com/lh/photo/b ... site"><img src="
https://lh3.googleusercontent.com/-gUyy ... G_1949.JPG" height="600" width="800"></a>
Then replace the bottom and carefully tighten all screws. I start all the screws by hand before tightening any of them. The small screws don't require much torque. The bigger ones require a little more.
Then, ideally, you will test your machine in a quiet room and measure with a SPL meter to see if the situation has improved.
Please post any data you have.
Questions welcome,
Mark
P.S. Next I'm trying a spacer to see if that helps it run quieter.


